{article.name}

How to Apply a Backsplash
A backsplash can instantly update your kitchen or bath with modern materials, a touch of color, and new textures, creating a customized focal point to draw the eye and tie your décor together. Adding a backsplash can be a simple job with stunning results, if you take care to apply it safely and securely.
Types of Backsplashes
The backsplash is a protective covering behind a sink, intended to protect the rear wall from splashes, soap scum, cooking grease, steam condensation, and other wear and tear. All types of tile – ceramic, porcelain, subway-style, glass mosaics, etc. – are popular backsplashes, but there are many other materials that can be eye-catching and attractive options. Depending on the style of your kitchen or bath, the size of the space, the design flair you want to incorporate, your budget, and the other materials used in the room, you may want to consider a backsplash of…
- Stone, such as granite or marble
- Pressed tin, available in different colors and patterns
- Mirrored glass or mirror mosaics
- Stainless steel in different color finishes
- Concrete, for a modern industrial look
- Cork for a rustic touch
- Chalkboard, ideal for leaving messages, lists, or notes
Before choosing a backsplash, investigate different styles for inspiration to find exactly the design, color, and pattern you want in your room. It may be possible to use small samples to see how the material would look with your lighting, or consider how it will coordinate with other materials, fixtures, and finishes nearby.
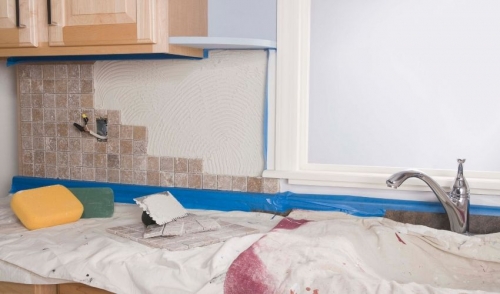
Applying a Backsplash
While the exact materials and tools you need to apply a backsplash will depend on the wall surface you are covering, the size of the backsplash area, and what type of backsplash you are installing, the basic procedure is the same.
- Carefully read any installation instructions, guidelines, or recommendations for your chosen backsplash, and be sure you have the proper tools and equipment for the project.
- Clean the wall thoroughly, removing all grease and other accumulations. Smooth out any rough patches or noticeable bumps that may make your backsplash uneven.
- Protect the work area with plastic or fabric drop cloths. Remove unnecessary items – small appliances, decorative accents, etc. – from the area to protect them and free up work space.
- Measure the backsplash space carefully, taking measurements in several places to be sure it is even or that any uneven dimensions are properly accounted for.
- Cut the backsplash to size if necessary, or cut any essential corners or cutouts to accommodate odd shapes, outlets, switches, etc.
- Apply adhesive to the wall if necessary. Some backsplashes will have peel-and-stick backing and may not need additional adhesive, but follow all installation instructions carefully.
- Apply the backsplash slowly and evenly, ensuring it is properly spaced and aligned. Press and hold the backsplash firmly for several minutes to ensure a secure bond to the wall.
- Apply grout or other edging or filler to the backsplash if needed (this will vary depending on the type of backsplash), filling in spaces thoroughly and evenly.
- Clean the backsplash gently, removing any excess material. Several cleanings may be necessary as materials dry or season.
- Allow the backsplash to set for the recommended amount of time, without using the nearby space and risking damage or disruption before it has become fully secure.
- Enjoy the refreshed, new look of your backsplash!
Applying a new backsplash can take just a few hours, but it is a project you will enjoy seeing the results of for years as it rejuvenates an otherwise overused, outdated space in your kitchen or bath. With the proper steps and attention to detail, you can easily add a new backsplash and will quickly be enjoying its new look in your home.
Comments